
mTLS with Traefik: Hands-On Setup with Step CA
Standard TLS is one-way: the client verifies the server’s certificate, but the server accepts any client. Mutual TLS (mTLS) adds the reverse – the server also verifies the client’s certificate. Both parties prove their identity before communication begins.
This matters for:
- Zero-trust architectures – verify every connection, not just network boundaries
- Service-to-service authentication – no shared secrets or API keys
- Device authentication – IoT, mobile apps, or any non-human client
- Compliance requirements – PCI-DSS, HIPAA, and others mandate strong authentication
This guide walks through setting up mTLS with Traefik as the reverse proxy and Smallstep as the certificate authority. By the end, you’ll have a working local environment where clients must present valid certificates to access services.
Code: github.com/moabukar/playground/tree/main/traefik-mTLS
How mTLS Works
In standard TLS:
- Client connects to server
- Server presents its certificate
- Client verifies the certificate against trusted CAs
- Encrypted connection established
In mTLS, there are additional steps:
- Client connects to server
- Server presents its TLS certificate
- Client verifies the server’s certificate
- Client presents its TLS certificate
- Server verifies the client’s certificate
- Access granted
- Encrypted connection established
The server is configured with a list of trusted CA certificates. If the client’s certificate wasn’t signed by one of those CAs, the connection is rejected at the TLS layer – before any application code runs.
Architecture Overview
┌──────────────┐     mTLS      ┌─────────────┐              ┌─────────────┐
│    Client    │──────────────►│   Traefik   │─────────────►│   Backend   │
│ (with cert)  │               │  (verifies) │    HTTP      │   Service   │
└──────────────┘               └─────────────┘              └─────────────┘
       │                              │
       │                              │
       ▼                              ▼
┌──────────────┐               ┌─────────────┐
│   Step CA    │◄──────────────│    ACME     │
│ (issues certs)│   cert req   │  resolver   │
└──────────────┘ └─────────────┘Traefik: Reverse proxy that terminates TLS and enforces client certificate verification.
Smallstep CA: Private certificate authority that issues both server and client certificates. Supports ACME for automatic certificate management.
Client: Any HTTP client (browser, curl, application) that presents a valid client certificate.
Prerequisites
- macOS (or adapt commands for Linux)
- Homebrew
- Basic understanding of TLS concepts
- ~30 minutes
Install the required tools:
brew install step traefik dnsmasqStep 1: Configure Local DNS
We need custom domain names that resolve to localhost. You can edit /etc/hosts, but dnsmasq is cleaner for multiple domains.
Option A: Simple (Edit /etc/hosts)
sudo sh -c 'echo "127.0.0.1 ca.test dashboard.test app.test" >> /etc/hosts'Option B: Proper (Use dnsmasq)
# Install
brew install dnsmasq

# Configure to resolve all .test domains to localhost
echo "address=/.test/127.0.0.1" >> /usr/local/etc/dnsmasq.conf

# Start the service
brew services start dnsmasq
Configure macOS to use dnsmasq for .test domains:
sudo mkdir -p /etc/resolver
sudo sh -c 'echo "nameserver 127.0.0.1" > /etc/resolver/test'
Verify it works:
dig app.test @127.0.0.1

# Should return:
# ;; ANSWER SECTION:
# app.test.    0    IN    A    127.0.0.1
Step 2: Initialise the Certificate Authority
Smallstep provides a lightweight CA that’s perfect for development and internal PKI.
step ca init --name="Local Dev CA" --dns="localhost,ca.test" --address=":54321" --provisioner="admin@example.com"You’ll be prompted for:
- Deployment type: Standalone
- PKI name: Local Dev CA (or whatever you like)
- DNS names: localhost,ca.test
- Bind address: :54321
- Provisioner name: admin@example.com
- Password: Choose something memorable (you’ll need it)
This creates:
- Root CA certificate and key
- Intermediate CA certificate and key
- Default provisioner for issuing certificates
Output shows the file locations:
✔ Root certificate: /Users/you/.step/certs/root_ca.crt
✔ Root private key: /Users/you/.step/secrets/root_ca_key
✔ Intermediate certificate: /Users/you/.step/certs/intermediate_ca.crt
✔ Intermediate private key: /Users/you/.step/secrets/intermediate_ca_key
Add ACME Provisioner
Traefik uses ACME to automatically request certificates. Add an ACME provisioner to the CA:
step ca provisioner add acme --type ACMEInstall Root Certificate
For browsers and system tools to trust certificates issued by your CA:
step certificate install ~/.step/certs/root_ca.crtThis adds the root certificate to your system’s trust store. You’ll be prompted for your system password.
Start the CA
step-ca ~/.step/config/ca.jsonKeep this terminal open – the CA needs to be running for certificate operations.
Step 3: Configure Traefik
Create a directory structure:
mkdir -p traefik-mtls/{conf,certs}
cd traefik-mtls
static.yml (Main Configuration)
# static.yml
providers:
  file:
    directory: ./conf
    watch: true

entryPoints:
  http:
    address: ":80"
  https:
    address: ":443"

api:
  insecure: true
  dashboard: true

certificatesResolvers:
  stepca:
    acme:
      caServer: https://ca.test:54321/acme/acme/directory
      email: admin@example.com
      storage: ./certs/acme.json
      httpChallenge:
        entryPoint: http

log:
  level: DEBUG

accessLog: {}
Key settings:
- certificatesResolvers.stepca: Configures ACME to use our local Step CA
- caServer: Points to the Step CA’s ACME endpoint
- httpChallenge: Uses HTTP-01 challenge for domain validation
conf/dynamic.yml (Routes and Services)
# conf/dynamic.yml
http:
  routers:
    # Dashboard - standard TLS (no client cert required)
    dashboard:
      rule: "Host(`dashboard.test`)"
      entryPoints:
        - http
      middlewares:
        - redirect-to-https
      service: noop@internal

    dashboard-secure:
      rule: "Host(`dashboard.test`)"
      entryPoints:
        - https
      service: api@internal
      tls:
        certResolver: stepca
        domains:
          - main: dashboard.test

    # App - mTLS required
    app:
      rule: "Host(`app.test`)"
      entryPoints:
        - http
      middlewares:
        - redirect-to-https
      service: noop@internal

    app-secure:
      rule: "Host(`app.test`)"
      entryPoints:
        - https
      service: backend
      tls:
        certResolver: stepca
        options: mtls
        domains:
          - main: app.test

  middlewares:
    redirect-to-https:
      redirectScheme:
        scheme: https
        permanent: true

  services:
    backend:
      loadBalancer:
        servers:
          - url: "http://localhost:8080"

tls:
  options:
    mtls:
      clientAuth:
        caFiles:
          - /Users/you/.step/certs/root_ca.crt
        clientAuthType: RequireAndVerifyClientCert
Critical configuration – the tls.options.mtls block:
- caFiles: Path to the CA certificate that signed client certificates. Only clients with certificates signed by this CA will be accepted.
- clientAuthType:
RequireAndVerifyClientCertmeans the client MUST present a valid certificate. Other options:RequestClientCert: Ask for cert but don’t require itRequireAnyClientCert: Require cert but don’t verify against CAVerifyClientCertIfGiven: Verify if provided, but don’t require
Update the caFiles path to match your Step CA installation.
Start Traefik
traefik --configfile=./static.ymlAt this point:
https://dashboard.testworks with standard TLS (no client cert)https://app.testrequires a client certificate (and will fail without one)
Step 4: Generate Client Certificates
With the CA running, generate a certificate for a client:
step ca certificate "client" client.crt client.key \
  --provisioner="admin@example.com" \
  --san="client@example.com"
You’ll be prompted for the provisioner password (set during CA init).
This creates:
client.crt: The client’s certificateclient.key: The client’s private key
Test with curl
# Without client cert - should fail
curl -v https://app.test
# Error: SSL peer certificate or SSH remote key was not OK

# With client cert - should succeed
curl -v --cert client.crt --key client.key https://app.test
# 200 OK (assuming backend is running)
Browser Configuration
Browsers need the certificate in PKCS#12 format:
step certificate p12 client.p12 client.crt client.keyEnter a password to protect the bundle.
Import into your browser:
- macOS Safari/Chrome: Double-click
client.p12, add to Keychain - Firefox: Settings → Privacy & Security → Certificates → View Certificates → Import
Now when you visit https://app.test, the browser prompts you to select a client certificate.
Step 5: Run a Backend Service
For testing, run a simple HTTP server:
# Python
python3 -m http.server 8080

# Or Node.js
npx http-server -p 8080

# Or Go
go run -mod=mod github.com/example/simple-server
Now https://app.test should proxy to your backend – but only if the client presents a valid certificate.
Complete Docker Compose Setup
For a reproducible environment:
# docker-compose.yml
version: '3.8'

services:
  step-ca:
    image: smallstep/step-ca:latest
    volumes:
      - step-ca-data:/home/step
    ports:
      - "54321:9000"
    environment:
      - DOCKER_STEPCA_INIT_NAME=Local Dev CA
      - DOCKER_STEPCA_INIT_DNS_NAMES=localhost,ca.test,step-ca
      - DOCKER_STEPCA_INIT_PROVISIONER_NAME=admin@example.com
      - DOCKER_STEPCA_INIT_PASSWORD=changeme
    networks:
      - mtls-network

  traefik:
    image: traefik:v2.10
    ports:
      - "80:80"
      - "443:443"
      - "8080:8080"
    volumes:
      - ./traefik/static.yml:/etc/traefik/traefik.yml:ro
      - ./traefik/conf:/etc/traefik/conf:ro
      - ./certs:/etc/traefik/certs
      - step-ca-data:/step-ca:ro
    depends_on:
      - step-ca
    networks:
      - mtls-network

  backend:
    image: nginx:alpine
    networks:
      - mtls-network

volumes:
  step-ca-data:

networks:
  mtls-network:
Debugging mTLS Issues
Check Certificate Details
# View certificate contents
step certificate inspect client.crt

# Verify certificate chain
step certificate verify client.crt --roots ~/.step/certs/root_ca.crt
Test TLS Handshake
# Verbose TLS output
openssl s_client -connect app.test:443 -cert client.crt -key client.key -CAfile ~/.step/certs/root_ca.crt

# Check what certificates the server requests
openssl s_client -connect app.test:443 -showcerts
Common Errors
“certificate required”
- Client didn’t send a certificate
- Check curl command includes
--certand--key
“certificate verify failed”
- Client cert not signed by trusted CA
- Check
caFilespath in Traefik config - Verify cert was issued by the same CA
“certificate has expired”
- Regenerate the client certificate
- Check system time is correct
Chrome issues with client certs
- Chrome has stricter requirements for client certificates
- Ensure the certificate has appropriate key usage extensions
- Try Safari or Firefox as alternatives for testing
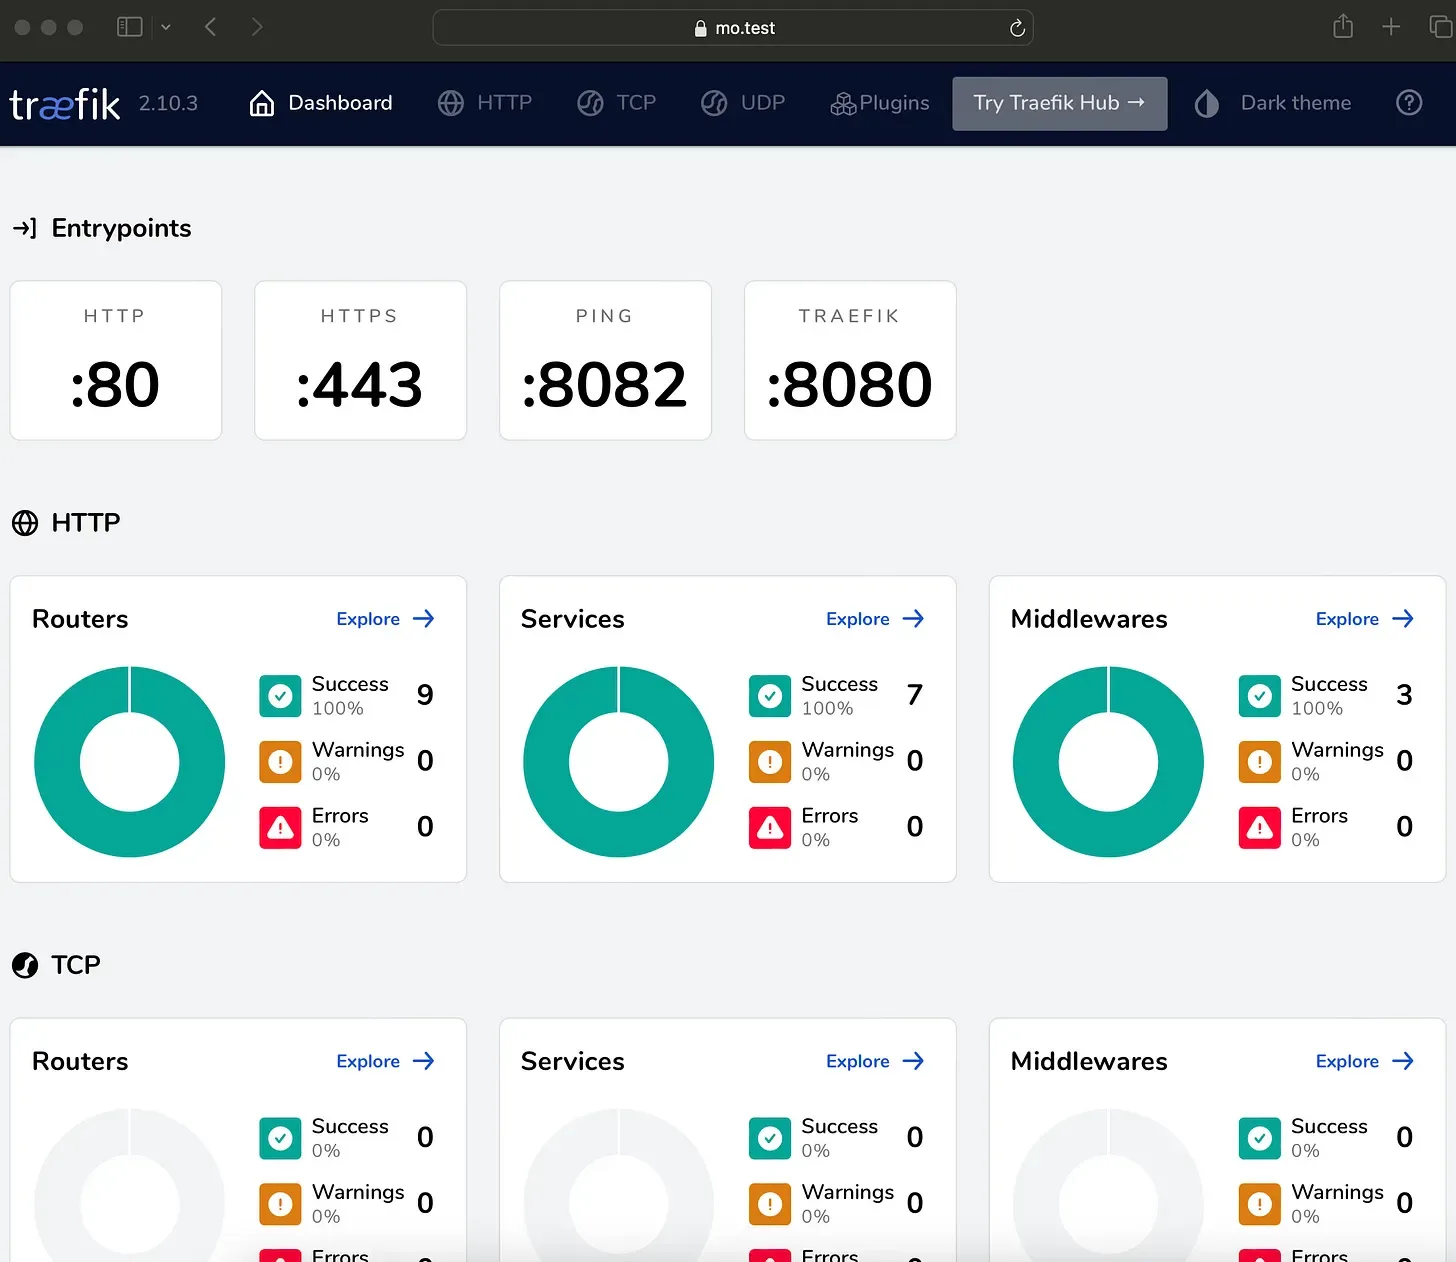
Traefik Dashboard Verification
Once everything is configured, the Traefik dashboard shows TLS status for each router:
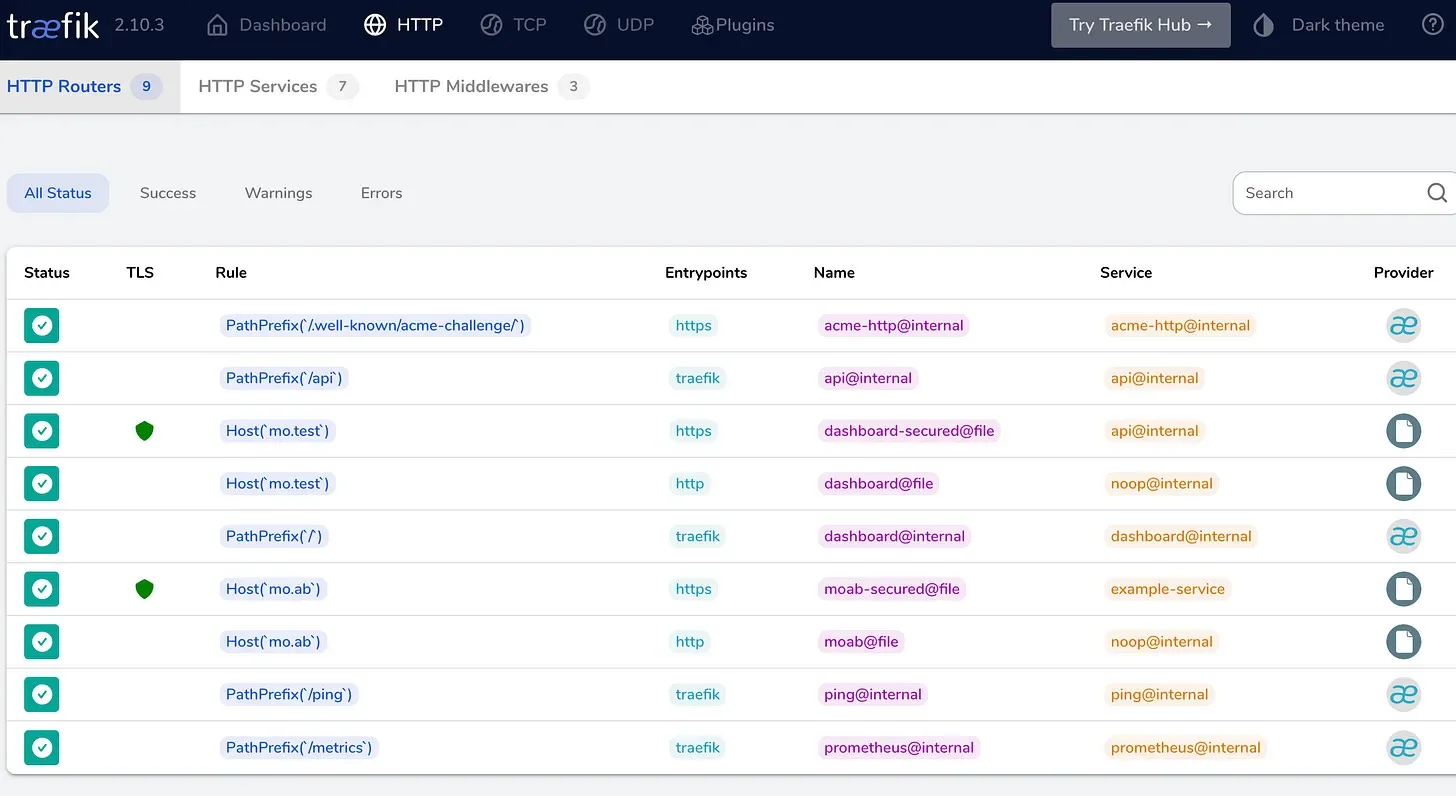
The green shield icon indicates TLS is active. Routes configured with mTLS options show the mtls TLS option applied.
Production Considerations
This guide uses a local CA for development. For production:
Certificate Rotation
- Client certificates should have short lifetimes (hours to days)
- Use
step ca renewor integrate with your CI/CD for rotation - Traefik reloads certificates without restart
Certificate Revocation
- Step CA supports CRL and OCSP
- Configure Traefik to check revocation status
- Have a process for emergency revocation
Provisioner Security
- Use separate provisioners for different environments
- Consider OIDC provisioners for user certificates
- JWK provisioners for automated systems
High Availability
- Step CA supports HA with a backing database
- Consider HashiCorp Vault for enterprise PKI
- Traefik can use multiple certificate resolvers
Monitoring
- Alert on certificate expiry (< 7 days)
- Monitor TLS handshake failures
- Log client certificate subjects for audit
Summary
mTLS with Traefik provides strong mutual authentication at the transport layer. The setup requires:
- A certificate authority (Smallstep, Vault, or your own)
- Traefik configured with
clientAuthTLS options - Client certificates distributed to services/users
The complexity is front-loaded – once the PKI is running, adding new clients is just issuing certificates. For service meshes and zero-trust architectures, this foundation is essential.
Code: github.com/moabukar/playground/tree/main/traefik-mTLS
Setting up mTLS in your environment or have questions about PKI? Find me on LinkedIn.